


🧾 Tally Prime – Sales Bill Print Settings Guide 🧾

1/ Tally is one of the most trusted accounting & GST software in India. But many users struggle with printing Sales Bills as per their business needs. Let’s explore how to set it up properly. 👇
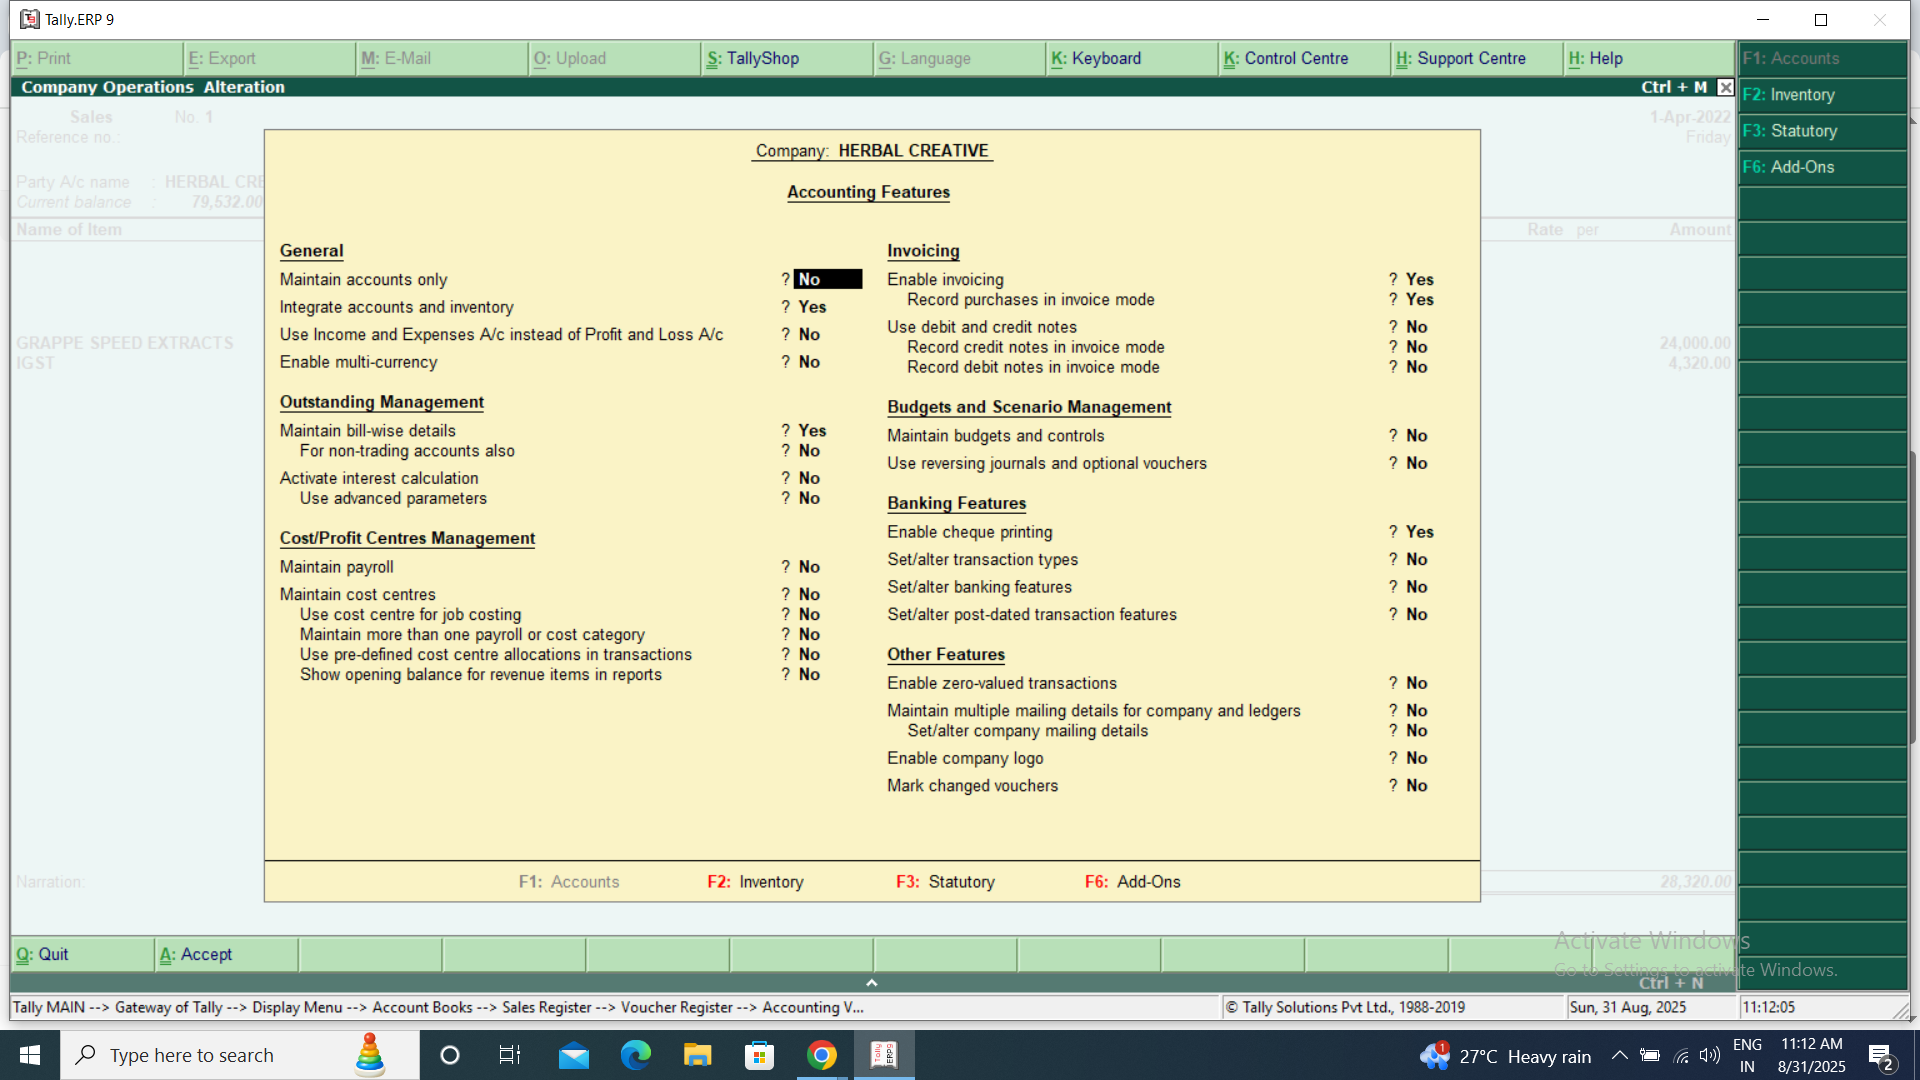
2/ Step 1: Open Tally Prime
Go to Gateway of Tally → Create/Alter Voucher Types → Sales Voucher.
Here, you can define how your Sales Invoice should appear.
3/ Step 2: Enable Print Settings
Navigate to:
🔹 Gateway of Tally → F11 (Features) → Accounting Features
🔹 Enable “Print voucher after saving” if you want bills to print automatically.
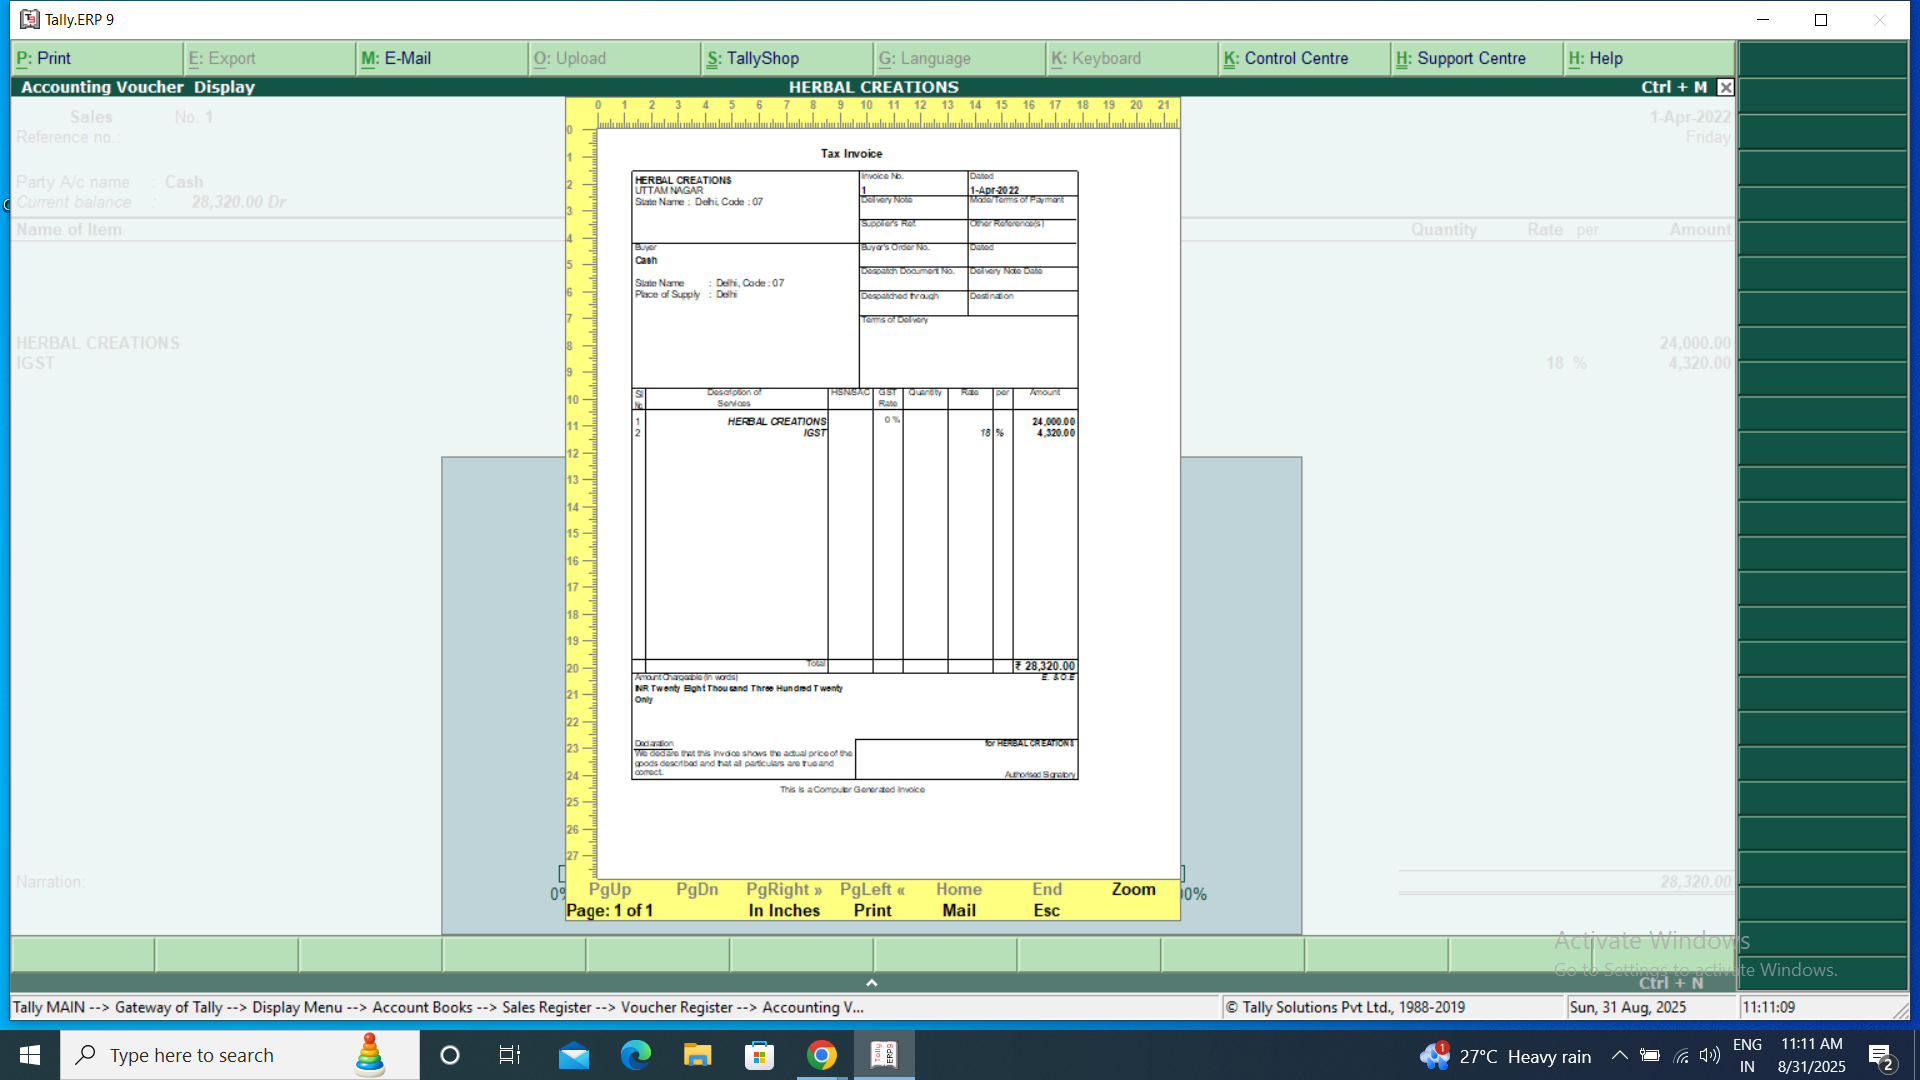
4/ Step 3: Customize Invoice Print
From Gateway of Tally → Alt + P (Print) → Configuration
Here you can:
✔️ Show Company Logo
✔️ Show Item-wise GST & HSN
✔️ Add Terms & Conditions
✔️ Print Bank Details (IFSC, A/c No.)
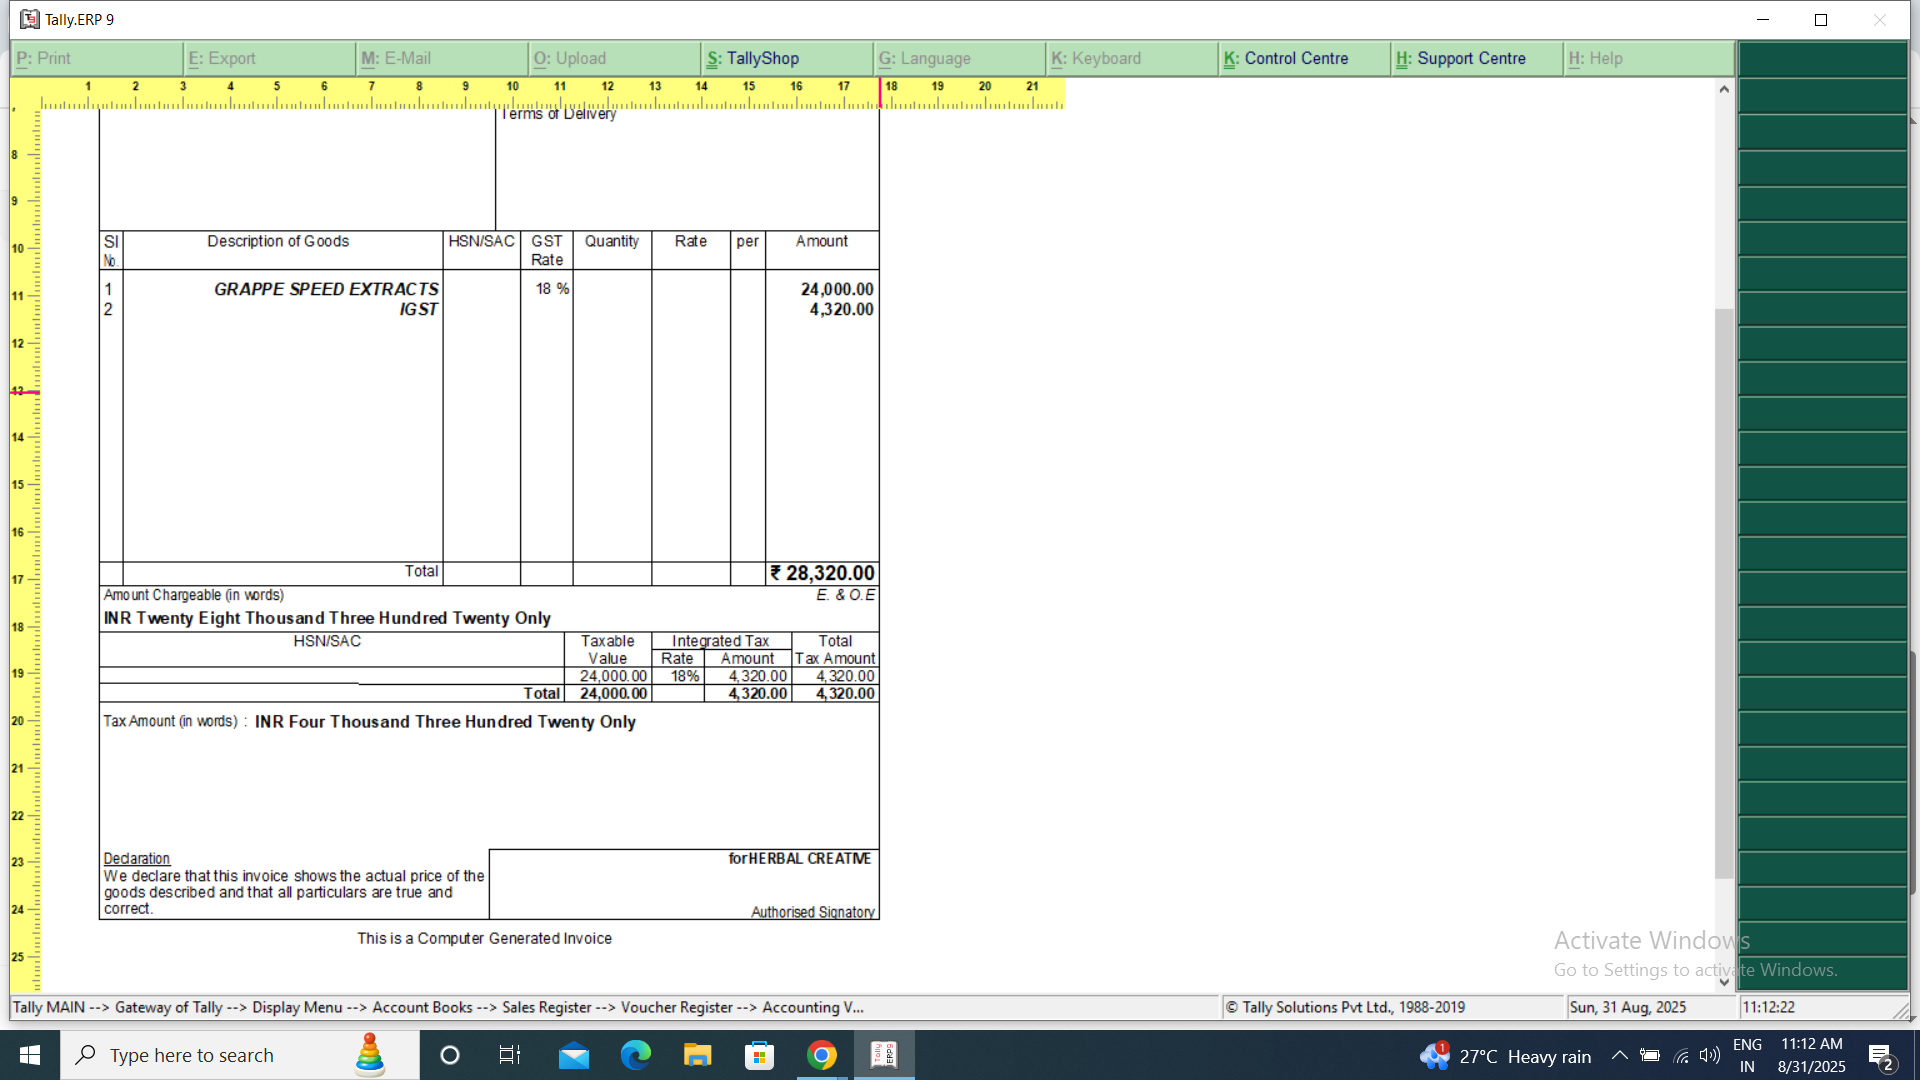
5/ Step 4: GST Settings
To display proper GST breakup on bills:
🔹 Enable “Print GST details”
🔹 Configure “Tax Analysis” for CGST, SGST & IGST
This ensures compliance-ready invoices. 📑
6/ Step 5: Layout Adjustments
Tally allows you to set:
✔️ Single or Multiple Copies (Original/Duplicate/Triplicate)
✔️ Invoice Format – Simple or Detailed
✔️ Print in A4/A5 or Pre-Printed stationery
7/ Step 6: Add Branding
You can upload your Company Logo (in BMP format) under F12 → Invoice Printing Configuration. This makes invoices look professional. ✨
8/ Step 7: Advanced Options
👉 Add Digital Signature
👉 QR Code for UPI payments
👉 Print Discount, Additional Charges, Transporter details, etc.
9/ Pro Tip 💡
Always test print on PDF before giving to a client. This helps spot alignment issues or missing details.
10/ ✅ Conclusion
By fine-tuning Sales Bill Print Settings in Tally, you can create invoices that are not just GST-compliant but also professional, clear, and branded for your business. 🚀
Happy Questing
Instagram - mrrajput_2212

Please sign in
Login and share