


How to Take Stunning Sunset Photos With Your Smartphone 🌅📷

Hello IQOO Family Members how are you doing all?
I'm here with new tips for photography, so let's start with tips.
Few times during the day are more beautiful than sunsets. Amazing golden colors, long shadows, and strong directional light sunsets are among the best times during the day to practice photography. In this thread, you're going to find out everything you need to know to take and edit extraordinary sunset photos with your smartphone.
Step 1: The Perfect Day
The success of any sunset photo is largely determined by the weather. Obviously you can't take sunset photos on an overcast day, but at the same time you don't want the sky to be perfectly clear. In fact, all my best sunset photos were shot with a partially cloudy sky, and interesting cloud patterns always add a nice character to otherwise plain photos.
Another thing that's great about sunsets with clouds is that they're truly unique. There are endless variations in cloud formations, literally making each sunset a once-in-a-lifetime photo opportunity.

Step 2: The Perfect Location
Next you have to find a good place where the sunset can be photographed. Beaches are probably the most popular location for sunset photography, but you can also take great sunset photos next to any body of water, in the mountains, or in a large open field.
No matter which option you pick, make sure that the sunset can actually be seen from your chosen location and nothing blocks the view to the west. If you’re on a beach facing east, you should consider taking sunrise photos instead. When choosing the location you should also consider the availability of interesting photography subjects, which we’ll cover next.

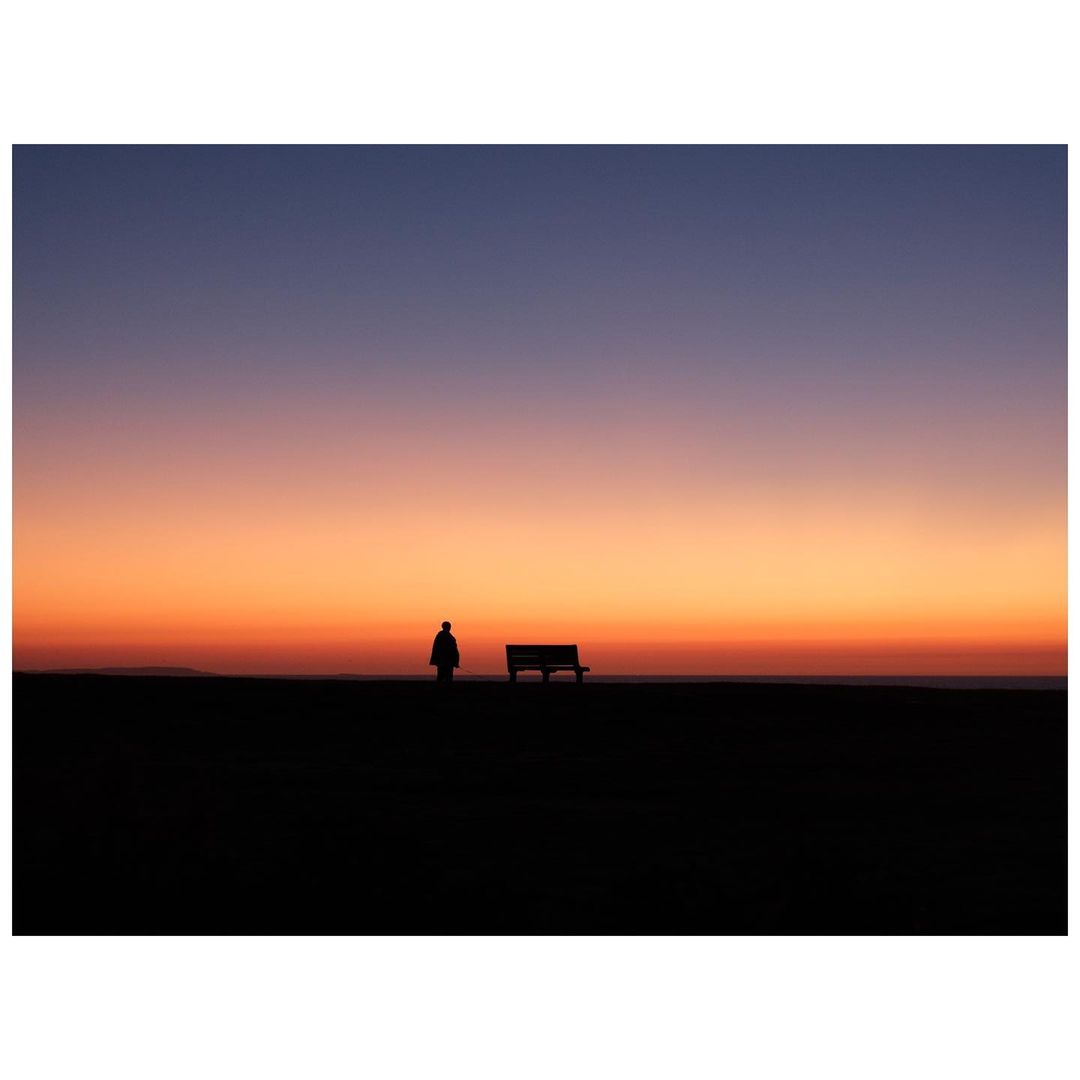
Step 3: The Perfect Subject
New photographers often take sunset photos with nothing but sunset in the frame, which is generally not a good idea because the sunset alone is not enough to create an interesting photo. You need to find something else to make the photo really stand out. My favorite subjects for sunset photos are people, which is why I prefer to take them at crowded beaches, boardwalks, busy parks and other places with a constant flow of people.
Of course, you could also use subjects other than people, but keep in mind that whatever you shoot against the setting sun will usually turn into silhouettes, so make sure that your subjects have an interesting and clear outline just like human subjects do.
If you include many subjects in your sunset photos, you want to make sure they don’t overlap. Since you can only see the outline of your subjects in silhouettes, your photos can quickly get confusing and generally won’t look as good if the subjects are overlapping.
Step 4: The Perfect Photo
When you’ve found the perfect day, the perfect location and the perfect subject, it’s time to take the perfect sunset photo. If you take photos of moving subjects like people, you will have to press the shutter many times until you capture the moment just right.
You should also take the shot from many different angles until you find the one that works best for that photo. Some of my favorite sunset photos were taken from a very low angle, allowing me to position the subject with nothing but sky in the background.
If you’re on the beach or next to other bodies of water, try placing your smartphone just an inch above the water and carefully take the shot using the volume buttons of your phone (it works on iPhone and some other smartphones). That way even tiny waves will look huge, and everything that’s reflected on the water will be unpredictably distorted.
You’re likely to get lens flare and white blown-out ares if you include the sun in the frame. In some photos that will look great (especially if you make the photo black and white), but normally you should avoid including the sun in your photos, which you can either do by leaving it out of the frame, or even better, hiding it directly behind your subject.

Step 5: The Perfect Editing
Finally, when you’ve taken the perfect sunset photo, it’s time to make it even better in post-processing. The best app for editing sunset photos is Snapseed, and it’s available for free on iOS and Android. I really like Snapseed because it offers precise control over some key adjustments that are needed to really make your sunset photos stand out.
For color photos, all you really need is the Tune Image module in Snapseed, where you can play around with brightness, contrast, ambiance, saturation and warmth sliders until you find the perfect combination for each photo. To get a beautiful golden sunset I typically increase ambiance, saturation, warmth and contrast, and decrease brightness a bit. You should play around with these adjustments until you find the best values for each photo.

I hope this thread inspires you to take sunset photos with your own smartphone. Now you are fully equipped to take and edit sunset photos that look great, create lasting memories, and in many cases look better than the actual sunset looked in real life.
Thanking You
Aniket Patil @Andybitts
Moderator @iQOO Connect
Please sign in
Login and share